This the first time I have used my orchid stamp bundle from Hero Arts, "SB103 Color Layering Orchid In A Pot". It was one of gifts I received as a Christmas gift. The set I received includes the stamp set, layering ink and the dies that I used for this card. It is always such fun to stamp the images with the different layers of ink and get such a perfect image. The look of a watercolored image without the all the talent required. I layered my orchid on an embossed panel and a stitched rectangle die from Lil' Inker. This card is a combination of old and new from my ever growing collection of cardmaking stuff. The embossing folder is an older one by Cuttlebug/Provo Craft, sorry I don't know the name. The sentiment is also an older stamp from my collection that is no longer available from JustRite Stamps. I am sharing my card even though some of the things used are not readily available because I think it could easily be done using a totally different sentiment and embossed background.
Thank you for dropping by to check out my latest creation. Your comments, questions of suggestions are always welcome.
Saturday, January 21, 2017
Friday, January 13, 2017
Magic Slider Winter Birthday Card
One of the gifts I received for Christmas this year was the Magic Slider die from Simon Says Stamp. I hadn't gotten an opportunity to use it yet. I thought I would give it a try and make my first slider card. Jennifer McGuire did a video before Christmas for the SSS Die-cember release. Her youtube video features this die with an great explanation of it's use at the end of a product release post. HERE
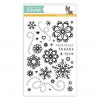
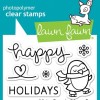
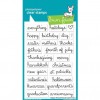
This is what the my card looks like when you pull open the magic slider. I used distress ink and a stamps from "Cute Snowflakes" set by Simon Says Stamp for the snowy background. All the other stamps used are by Lawn Fawn.
Thank you for dropping by to check out my first Magic Slider card. It was fun to make. Your comments, questions and suggestions are always welcome.
Challenges:
Supplies:
Tuesday, January 10, 2017
Wishing All A Happy, Healthy & Prosperous New Year!
I am looking forward to the New Year and hoping that recent health issues for my husband and myself are left behind in 2016. December was a hectic month for me, not only was there all the usual holiday excitement, but I was recovering from knee replacement surgery. My surgery went very well and I am back to my blog with a clean slate for the 2017.
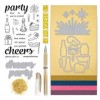
Today I am sharing a couple of my latest cards to celebrate the New Year. I used the Hero Arts Monthly December Kit for both. Love the dimensional burst die that is included in the kit. The kit also includes some wonderful papers and a very glittery gold embossing powder. Perfect for cards with a lot of pizzazz.
For the top card:
- Cut the blue glimmer paper to 4" X 5 1/4" and the gold foil paper to 4 1/4 X 5 1/2.
- Diecut the burst from the glimmer blue paper and draw a line on each beam with the gold pen from the kit.
- I cut the sentiment apart, stamped the New Year portion from Hero Arts " Greetings for the Holidays" CL619 with VersaMark and heat embossed with the gold glitter powder.
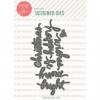
- Diecut several of the star bursts and Happy " Merry and Bright" Ellen Hutson EEDIEJ-006-14 from the gold fold paper and glue with dot of Multi Medium to the tips of the beams. I added a bit of multi medium under each beam and let it dry to help maintain the dimension in the burst.
- Adhere the blue to the gold layer and then both to a A-6 white card base.
For my second card:
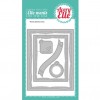
- Used Allery Elle "Wonky Stitch Die" D-04-11 to cut the blue panel and a white card stock panel. I also used a smaller rectangle die from "Lil' Inker Designs " stitched rectangles for stamping the champagne bubbles.
- Stamp and die cut the bottle from a scrap of green glimmer paper (in my stash) and again on a scrap of white CS for the label. I used the small circle from a die cut tag to add for the gold label. Color added with Antique Linen Distress Marker.
- Die cut the "Cheers" from both the gold foil and the blue glimmer papers.
- After cutting the burst from the gold foil, I cut away the excess paper to reveal the beams of the burst.
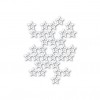
- My stars are from my stash and created with the Simon Says Stamp "Stacked Stars" Die SSD111599.
- The "2017" was created using my Silhouette.
- The card base is A-6. 4 1/2" x 6".
Supplies:
Subscribe to:
Comments (Atom)


