Showing posts with label Hero Arts. Show all posts

Saturday, August 18, 2018

Hero Arts Coffee Lovers Tunnel Card

The Hero Arts My Monthly Kit for August arrived and I was anxious to have some fun with it.   The fancy frame die included this month kit was an immediate favorite.   This die alone makes the price a bargain in my mind.  When I saw this Youtube video from Jennifer McGuire, I was inspired and ready to challenge myself to make an inside tunnel card. 


From the outside the card is sorta fun.  I used a border die from Simon Says Stamp, the DOT SCALLOP BORDER Wafer Die, to make my scalloped background layer.   All of the stamps I used here are included in this month's kit.  I colored the cups with my copic markers and die cut them using the coordinating dies in the kit.  Then, I  coated them with VersaMark embossing ink and used a clear embossing powder to give them a glossy finish.


The MAGIC happens when you open the card to the inside tunnel.   I followed the tutorial from Jennifer but made my card but made a few modifications to create this version.    I typically make my cards A6 size.  This size uses a base of 6"X 9" as opposed to your the commonly used A2 size base of 5 1/2" x 8 1/2".   You will still cut two base cards and cut off  1/2" from the edge of one of  the 6"X 9" base cards and the score line will be at 4 1/2".  The second base card will be scored at 1/2", 4 1/2",and 5".  The inside tunnel panel is cut to 4 1/2" by 6",  you will need to cut a sliver off the 4 1/2" edge. then score it at 1/4" on both sides.   I used the fancy frame die to cut the first layer of my tunnel.  I cut the frame die a second time from a piece to scrap so that I could use just the table and chairs parts for my cafe scene.   To make an opening for the inside tunnel layer, I used a Die-namics Inside & Out Stitched Rounded Rectangle  an lined it up like a window to my cafe.
I added just a touch of coloring to the inside of the tunnel using Distress Oxide Inks, TUMBLED GLASS and ICED SPRUCE.   I added the extra tables to the back side of my inner layer and stamped the sentiment from the kit using the Iced Spruce Distress Oxide ink.
Sounds complicated but it was such fun and worth the effort.  I know this because I am ready to do it again soon.

Thank you for dropping by my blog.   Your comments, questions and suggestions are always very welcome.

Wednesday, November 15, 2017

Hero Arts Christmas Shaker

When I got the Hero Arts My Monthly Kit for October my first idea was a snow globe and of course it would need to be a shaker too.  The October kit is sold out but I thought I would share my card for those of you who have the kit and might find some inspiration in my card idea.

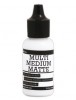
I created the snow globe using a stamp and die set from Lawn Fawn "Ready Set Snow" LF 973 and LF 975.  My card is a square card measuring 5 1/2" X 5 1/2" overall.   My north pole scene was stamped then colored using Prismacolor pencils onto a panel of white card stock measuring 5" X 5".  My shaker panel is  created by cutting the snow globe from fun foam and the patterned paper taking care to line up all the openings above the image.   To assemble the shaker, I glued the foam in place with multi media matte , added the sequin mixture then a piece of acetate and the pre-stamped patterned paper.   The snow globe base was stamped onto a scrap of the red card base and cut out with the coordinating die set.  To finish it off I added the cute Eskimo dog sled, a bow from a bit of waxed cording and couple of glittery brads from my stash to embellish the sentiment.  

This is a second card that I made using the October Kit.   I used a oval die to cut out my focal area from white card stock that I then embossed using a folder from Cuttlebug "Ben Day Dots"  The little scene was created using post it notes as masks, stamping an coloring with copic markers.  In the end I also drew in a little building with a micron marker behind the train because the stamp lines were hitting in the wrong spot on the little train.  It worked and I think it looks better after that little correction of my mistake.

Thanks so much for dropping by my blog.  I hope you found something to inspire you to create something fun.  Your comments, questions and suggestions are always welcome.

Monday, March 20, 2017

Hero Arts Spring Cards

The cards I am sharing today were created with some special recipients in mind.  These are among a group of cards that I plan to donate to "Cards For Hospitalized Kids Charity".  Their mission is to send cards to hospitals all over the US to help brighten the days of seriously ill children who often feel scared and lonely.

Here's their website if you would like more information:
www.cardsforhospitalizedkids.com/


All four of my cards use a predominance of Hero Arts products.  This first one uses the monthly kit from March and one of the add on sets from February called " Fun In the Rain" CM152.  For the watery background I used a wash of watercolor and then added the pooling and splashes with stamps from the set and Distress Tumbled Glass Ink.  The duck and ducklings are colored using Copic Markers.

This second card is created using the " Paper Layering Rabbbit"  DI371 and elements from the Hero Arts March Kit of the Month.   The fence, Easter basket with eggs and the burlap are all from the March Kit.  I used Copics to color the basket and eggs and added just a touch of color the bunny with colored pencils.


This one is probably my favorite of the four.  I just love the way the vegetables from the set can be tucked into the garden soil created using the die from the March set.  There is also a sentiment that says "how does your garden grow" which would be perfect for a gardening friend.  I chose this one because it is meant to cheer a sick child.  All the coloring is Copic except the cloudy sky which I created by sponging Distress Ink over the clouds included in the February Hero Arts monthly kit.

This is the closed view of my box card

The last card is a box card.  When I get a new stamp set I often stamp all of the images on a heavy cardstock and color them without and idea as to where I will use them.  I like doing this because it allows me to make little scenes for my cards.  This card is one that I created using the colored images that I had left over from the cards above.
The box card base is from a die by Lawn Fawn.
This is the opened box card
I think that box cards are a lot of fun for children and hope this one will bring a smile this Easter.
The umbrella and rainbow are from the February monthly kit and the rest are from the March kit.

Thank you for dropping by my blog.  Your comments, questions and suggestions are always most welcome.


Supplies:


<

Saturday, January 21, 2017

Hero Arts Orchid Card

This the first time I have used my orchid stamp bundle from Hero Arts, "SB103 Color Layering Orchid In A Pot".  It was one of gifts I received as a Christmas gift.  The set I received includes the stamp set, layering ink and the dies that I used for this card.   It is always such fun to stamp the images with the different layers of ink and get such a perfect image.   The look of a watercolored image without the all the talent required.  I layered my orchid on an embossed panel and a stitched rectangle die from Lil' Inker.  This card is a combination of old and new from my ever growing collection of cardmaking stuff.   The embossing folder is an older one by Cuttlebug/Provo Craft,  sorry I don't know the name.  The sentiment is also an older stamp from my collection that is no longer available from JustRite Stamps.  I am sharing my card even though some of the things used are not readily available because I think it could easily be done using a totally different sentiment and embossed background.

Thank you for dropping by to check out my latest creation.  Your comments, questions of suggestions are always welcome.


Sunday, October 16, 2016

Vintage Christmas Card

Made this one for the Merry Monday Christmas Challenge #217.  I have been trying to play along with this challenge for awhile and today I was determined.  I barely made the deadline but this is going to be my first entry.  There are a lot of very talented card makers who are regular contributors.  Christmas cards are my favorite and I make plenty of them each year.  I usually end up sending out about 70 and since I don't like to do a lot of duplicates there is a lot to get done.  I don't ever consider it work because for me it is fun. The only hard part is getting them done in time so I start early.

The inspiration for this card was a beautiful card that I saw on Pintrest by Michelle Lupton for the layout and the Vintage Theme from the Challenge.  The patterned paper is from my stash and I am not sure of the company. Sorry.  The stamps are all Hero Arts.

Thank you dropping by my blog.  Your comments, questions and suggestions are always very welcome.

Supplies:

Tuesday, October 11, 2016

Elf Shaker

Today I am sharing a shaker card for Christmas.


  • I created my shaker window by cutting a frame using two of the dies from the INSIDE AND OUT ROUNDED RECTANGLE STAX by Die-Namics .
  • The two dies were held in place using micro fiber tape then used to cut the frame five times from cardstock.
  • These 5 frames are then stacked and glued together with multi medium matte. 
  • You will need to cut one more frame from patterned paper.
  • The window covering is cut from clear acetate using only the larger outer die from the frame.
  • I used the multi medium matte to adhere the assembled frame around my scene.
  • After the glue is dry I added my mixture of sequins for the shaker.
  • I like to use my anti static powder over the acrylic before I attaching it with Scor-tape to the top of my window. 
  • Adhere the patterned paper on top, also using the Scor-tape.
  • The elf is added to the outside of the window. He was also colored using Copics.
  • My sentiment is a partial cut out from a background die by Memory Box.
I will entering this one in the current challenge with a2zscrapbooking.

Thank you for stopping by my blog.  Your comments, questions or suggestions are always most welcome.

Supplies:


Monday, February 8, 2016

Hero Arts Fabulous Flowers


The card I made for the current Hero Arts challenge Fabulous Flowers is a combination of plan and accident.

Many of my cards start out with a plan that changes midstream because of something going a bit wrong. I started with a background that I created with watercolors from my recent watercolor class. The mistake happened when I tried to stamp the flower image directly to the background. Of course, it was totally lost on this bright background.

Plan #2: Just cover it and make a new plan. What any self respecting card maker would do...right? Not bad, until I noticed that a tiny bit of the stem from my original stamping showed on the bottom edge.


Plan #3: You may notice that the hello sentiment is right on the edge of my oval. Guess what that covers up. A tiny bit of stem from my original mistake. Oh yes, one more thing. I decided to place a few scattered sequins. They also cover the tiniest little bit of that original image.

All in all, I think it turned out to be a happy accident card. Many of my cards begin this way and some of them end up becoming something I like.

Thanks you stopping by! Your comments, questions and or suggestions are always welcome.

Monday, January 18, 2016

Happy Valentine's Day 2016


This will be the first post on my new and improved blog! 
Previously I had a wordpress blog spot that for reasons unknown to me got corrupted. Once that happened and after many months of trying without success to retrieve my work, I have decided that I must start again. Here it the first post. My site is not a completed work, but I am anxious to post again.

My first post as it turns out will be Valentines Day card.   Appropriate because it is one of my favorite card making holidays. 

My card uses the Hero Arts January Kit.  I have started to get this monthly kit and so far I love it. 
Almost everything used on the card came with the kit. The only things I added were the arrow embellishment which I took from a cut file for the Silhouette "11pc Valentine Set" and the Lil' Inker Design "Stitched Rectangles" Die for my panel. My front panel was splattered with a watercolor to match the colors front the kit.
To create the shaker card.
1.  Die cut the front panel along with a identical panel from thin fun foam. 
2.  Attached the foam panel to the card with a strong tape like scor tape, outlining the edges of  the opening closely to avoid lost shaker bits. 
3.  Use the scor tape to outline the opening again on the outward facing foam panel.
4.  Add your shaker mix to the well created by the fun foam before exposing the sticky scor tape. 
5.  Attach the acrylic square to top of the opening.
6.  Finally, add the front panel.


Thanks for visiting my new blog!  I love questions and comments so feel free.  Also love to hear any suggestions you may have.