Showing posts with label June 2016 Kit. Show all posts

Thursday, September 8, 2016

Layered Snowflakes

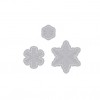
Today I got out my newest Hero Arts die sets and had fun creating for the 2016 Christmas season.  This 3-D snowflake set is a great set.  Once I started playing with it, the possibilities seemed endless.

For this first card, I used both layers of the dies. 

  • I first arranged the dies outlines on a layer of patterned paper and cut out those spaces.
  • Then I adhered the cutout patterned paper to the front of my A-2 sized card.
  • I positioned the snowflake 3d dies in the spaces and ran them back through my Cuttlebug to cut the pop up insides.
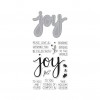
  • The Joy die is also from Hero Arts. I die cut it from " Foamies" glitter sticky back foam sheets.
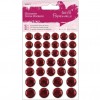
  • Centers of the snowflakes are Glitter Domes.


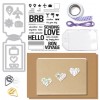
My second card uses the same two dies with addition of the tag die from the Hero Arts Monthly Kit for this past June. 

  • This time I cut only the inside of the snowflake on the panel inside the tag.
  • I also added a layer of silver glitter paper behind the snowflakes that show through when the snowflakes are popped out.
  • The Joy sentiment is again cut from the adhesive backed glitter foam.  
  • To finish the card I added two tags of patterned paper from my stash and an small tag to carry the rest of the sentiment.
  • I added the gems to the centers of the snowflakes and a bit of silver twine to embellish.


 Finally, I made this tag from some of remaining pieces on my craft table.  
  • The snowflake here is both of the die layers cut from the same piece of glimmer paper.
  • From the adhesive backed glitter foam,  I die cut the Joy sentiment and the enforcement ring at the top of the tag.  I used the inside of that ring for the center of the snowflake..
  • I used a "Kaiser Glitter Gel Pen" to add the stitching and a outline of part of the sentiment (hoping to hide a overstamping and make it look intentional).
  • Some ribbon and twine from my stash to finish it off.
I am entering this tag and the card with tag in the current challenge with a2z Scrapbooking Supplies "Make it a Tag!" 
The 3D snowflakes will also work for the texture challenge with A Blog Named Hero. Here

Thanks for dropping in.  Your comments, questions and suggestions are always welcome.


Supplies:


Tuesday, June 7, 2016

Look For The Miracles / SSS June Kit


I am back to share four cards that I created with the Simon Says Stamp Card Kit for the Month of June.  Almost everything I used to make my cards is included in the kit.


This first one is easily done by adding some fun coloring and shading with Distress Markers.  I gave a bit of shimmer by making  patterns on the lettering using glitter gel pens from Kaiser colour.  One of which came with the kit.  The others are from my own stash.  After the coloring I simply cut out the panel and layered it on one of the patterned papers from Bo Bunny 6X6 " "Believe", from the kit.  To finish I added a few sequins from my own collection.


For this second card I used the rubber stamps in the set to make a wreath around the sentiment.  The leaves that hang over the edge are fussy cut and glued in place using "Ranger Matte Multi Medium".  I layered the stitched circle with wreath element onto another of the patterned papers from the kit.  As a finishing touch I added a bit of shimmer using a Zig Wink of Stella pen.


This card was made with the help of my Misti tool.  I used it to make my own free style print pattern for the front panel.  The sentiment is printed from my computer onto vellum.  I applied clear embossing powder to the sentiment while it was still wet and heat embossed.  I added the small rectangle behind the vellum to make the sentiment pop a bit.   To finish I embellished it with some of the enamel dots from the kit and a bit of shimmer from the glitter gel pen. 


My fourth card is a easy shaker card.  I stamped the sentiment onto vellum and added black embossing powder to heat emboss. 
To create the shaker I cut a second square of white card stock 1/2" smaller than the vellum panel.  Then I used a strong double-sided tape like "Scor-tape" from the backside to make a pocket for the sequins.  The tape is added to the last side after the sequins are placed.  I used my bone folder tool to make sure that the pocket was totally sealed on all four sides before removing the protective cover on tape.  After the pocket was sealed I simply peeled the protective covering off and adhered the pocket to the front panel.   I embellished with some of the enamel dots from the kit at the four corners of the pocket.

I will be entering my cards in the current SSS Flickr challenge. 

Thanks for dropping in to see my SSS Card Kit creations.  Your comments, questions and suggestions are always most welcome.


Supplies: