Wednesday, August 31, 2016

CraZy Dog Birthday

I made this one for my daughter's boyfriend using the CraZy Dog stamp set from Tim Holtz.  One of the great things about these dogs is that with a slight bit of creative editing and coloring you can make them look similar to your own family pet.


I had to make the tail a little longer and the coloring was done with copic markers to mimic my daughters dog "Rory".  The glasses are an embellishment that has been in my stash forever.   I am not sure where I got them.
Rory is a wonderful mutt that we rescued from a high kill shelter.  He came to us through a group called "Rescue Warriors" that works with Veterans and their families.  They transport puppies from the high kill facilities in the south to cities like Chicago and find them homes.    

Rory loves to go for car rides with my daughter and sticks his head out of window while wearing his "doggles".   Actually, I think I captured his look and personality pretty well with the popped balloons.  That is definitely the way they would appear if he were near by.  

Thanks for dropping by my blog to have a look at my work.  Your comments, questions and suggestions are always welcome.

SUPPLIES:


Tuesday, August 23, 2016

Believe Christmas Cards

I have started to make a few of the Christmas cards that I will be sending out this season. Cardmaking is my thing and Christmas cards are most definitely my favorite.   As a result of that passion, I start early.   I usually send out about 70 cards each year, and make only one or two of each design so, an early start is essential. 

My first card uses a Penny Black stamp and a couple of the new techniques for the background that I got from the Tim Holtz Creative Chemistry Class. 
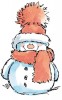
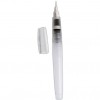
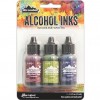
  1. I started by coloring the snowman with a combination of distress markers and Zig Real Brushes.  To achieve the lighter shadow coloring I used a water brush to pick up the color from my craft sheet.
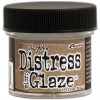
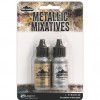
  2. Then I applied a thin layer of Distress Micro Glaze over the snowman, wiping off any excess with a paper towel.
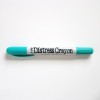
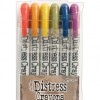
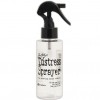
  3. Used Distress Crayons to color the background by first applying a scribbled on layer and then spraying with water and smearing the color with my fingers.
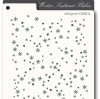
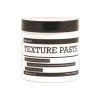
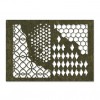
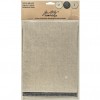
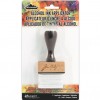
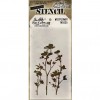
  4. Used a stencil from Memory Box "Tiny Snowflakes" 88583 and Ranger Texture Paste to make the background.  I also used a palatte knife and a little bit of the paste at the base of the snowman.  While texture paste was still wet I sprinkled on some Distress Stickles dry glitter, clear rock candy.
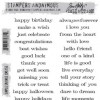
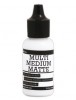
  5. For the sentiment I used Penny Black "Exultations" which I cut from black cardstock and fun foam.  I used mult media matte to glue them together and them to the card itself.  A bit of the white fun foam shows but I like the effect that it gives. 


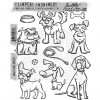
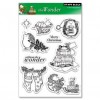
My second card also uses a Penny Black stamp for the focal image.  This one is from a clear stamp set called "the Wonder"30-040, an older set from 2009.  
  1. I colored the cat with distress markers using a combination of direct to paper and picking the color up from the craft sheet with a waterbrush.
  2. Die cut the image using Die-namics "Stitched Mini Scallop Rectangle"
  3. The the sentiment is debossed using Alterations Shadow Press "Christmas Set" .  I added some gold ink on the positive side of the embossing plate.
  4. Created a frame from a patterned paper in my stash ant the same scallop rectangle die. I cut a second one from fun foam to layer for extra dimension.

Thank you for stopping in to see my work.  Your comments, questions or suggestions are always welcome.

Supplies:


Thursday, August 18, 2016

Butterfly Border Birthday


I made this card for the current Wednesday Challenge on the Simon Says Stamp blog,  Make for the Border.    As the name implies the challenge is to make a card with a border.  The showcase company this week is Memory Box.   I decided to create my cutout border using one of my favorite Memory Box dies, "Vivienne Butterfly".  The border edge is a partial die cut technique.  There is a wonderful youtube video by Jennifer McGuire that gives instruction for this method.  Here
For my background I used Distress Crayons that I first scribbled on then misted and smudged.  To add a finishing touch I put some matching Distress Ink on my craft sheet. Then I added water to make a liquid that could be splatter with a brush.
My sentiment is much easier that it might seem.  I printed it with my ink jet printer onto vellum. While the ink is still wet I add clear embossing powder and heat emboss.  Looks great and it is so easy.  I can create a whole page at a time.

Thanks for dropping in to view my blog.  I always welcome comments, questions or suggestions.


Supplies:


Friday, August 12, 2016

12 tags of 2016 / August


This is my entry in the 12 tags of 2016 for the month of August. Tim's inspiration tag remixes two techniques from his previous tutorials, Brayered Stains and Frameworks.


I had to work a bit to come up with an idea for the Frameworks to use in my tag. Then again, isn't that what makes it a challenge.

All of the dies I own have smaller openings than the ones used in the samples.
My 4 die set of Alterations Thinlits worked better than I thought. 

The idea for filling the small mosaic spaces was taken from one of my homework projects in the Creative Chemistry 103 class. 
One of the techniques uses alcohol ink on Yupo Paper. My finished piece looked like a marble slab pattern. It was put to good use in this piece. I also die cut the same pattern from the foil cardstock to give it a little shine and interest.


The butterfly and the sentiment are both rubs that I applied to strips from the "Textile Surfaces"

I thought a touch of shimmer would be nice on the tag so I added a few spots of " Multi Medium Matte" and sprinkled on some "Distress Glitter Dust" in the Vintage Platuium color.