Showing posts with label Simon Says Stamp Wednesday Challlenge. Show all posts

Monday, June 15, 2020

Something Metallic Cards

Hello, to all my card making friends.  It has been awhile since my last blog post.  I am back!  If you were wondering where I have been I will explain at the end of this post. Today I want to share with you some cards that I made for the Simon Says Stamp Wednesday Challenge.  


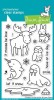
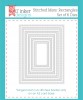
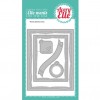
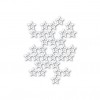
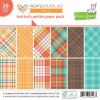
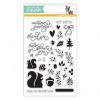
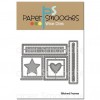
All three of my cards are surprisingly easy to create.  I like to make multiple cards with variations in colors and layouts.  For all three I used the SSS "Greeting Mix 2" stamp set for the sentiment, SSS "Leaves Lucky to Know You" stencil and the SSS "Etched Dragonfly" & SSS Bundle of Stitched Shapes dies. 


This purple version of the card uses three Distress Oxide Inks for the background and stenciled leaves;  Milled Lavender , Seedless Preserves  and Dusty Concord .  I die cut the Dragonfly Wings from DCWV "Holographics 6 X 6 stack and the body of the dragonfly from leftover bits of black cardstock in my stash.  
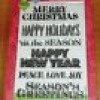
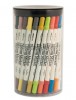
For my sentiment I used the  SSS "Greeting Mix 2" stamped with Versafine Black Onyx ink  but heat embossed with Brutus Monroe "Sterling Sparkle" Embossing Powder .


My blue version of the card is the one I am demonstrating on my Youtube channel.  If you are interested in seeing the card that way, I am sharing it below.  This one is just a slightly different layout and uses just two colors of Distress Oxide for the background ink blending and the stenciled leaves, "Speckled Egg" and "Stormy Sky".   I also added a few embellishment gems from Lucy's Little Things "Clear Iridescent jewels as a finishing touch.


For third version of the card was aiming for something on the more masculine side.  I changed up the colors of Distress Oxide Inks, this time choosing "Old Paper" and "Peeled Paint".  This time I cut my dragonfly wings from the green Tim Holtz"Metallic Confections Kraft Paper" that I had in my stash from the SSS Card Kit of the Month from September.  The greeting was stamped in Versafine Black Onyx ink  and heat embossed with a clear embossing powder.


Thanks so much for dropping by.  Your comments, questions and suggestions are always very welcome. 

Why I was MIA for a bit?
If you follow me with the Flickr Love group, you already know what was up with me.  To those who don't know, I was in a terrible car accident on November 15th.  My fellow card making friend, Marsha and I traveled from Chicago to Gina K's store in Milwaukee.  We had the most wonderful day with the bonus of meeting all of our stamping and coloring idols, Gina K, Kathy Racoosin, Jenifer McGuire, Kristina Werner, Rina K and Simon Hurley.  Just the best day ever. Until... As we traveling back to Chicago from Milwaukee, a speeding car came into our lane hitting us resulting in Marsha's car being forced into the concrete barrier.   We were both injured and ended our day with a trip to the ER in Kenosha, IL.  My injuries were the worst.  My right wrist was shattered in the accident.  I needed surgery and 6 months of occupation therapy.   We were very lucky to have survived the accident and had it not been for some wonderful truckers who stopped in time and diverted traffic, preventing us from being hit a second time, the story may have been worse.  The good news is that 3 weeks ago I was given a  release from the care my doctor and therapist with a near complete recovery of my wrist and hand movement.  All along it was my biggest goal to be able to get back to the thing that kept be moving forward,  my love of creating pretty things.  

x

Tuesday, May 29, 2018

More Coffee PLEASE!

I decided to get out one of my favorite stamp sets to make this fun card for this weeks Wednesday Challenge with Simon Says Stamp.    This weeks challenge was to use more than one stamp and the suggested product was Honey Bee Stamps.

The stamp sets I used were "BLAH BUNNY" and "BLAH BLAH BLAH" both by the Honey Bee stamps company.  I stamped the image using masks that I had already created for this set and saved from a previous card.  I colored the image using Zig Clean Color Markers and die cut it using a stitched rectangle die.  The enamel dots and patterned paper are from my stash.

Thank you for dropping in to check out my card.  Your comments, questions and suggestions are always welcome.

Sunday, May 6, 2018

Blossoms & Butterflies

This is the card I made to enter is this weeks Wednesday Challenge over at the Simon Says Stamp blog.  The theme for the challenge is "Animal Magic" and they are showcasing Gina K designs.   The stamps that I used on my card are from a clear set by Gina K Designs called "Birds & Blossoms".   I think that maybe butterflies can count as animals in an insect sense of the word? 


My background uses a stencil from The Crafters Workshop Rebekah Meier "Journal Musings" and the Distress Oxide Inks,  "Mermaid Lagoon" & "Squeezed Lemonade".   
I used VersaFine Onyx Black ink to stamp the butterfly image and the sentiment.   The leaves were stamped using Hero Arts Hybrid Ink Pad MOSS .    For coloring my image I used Zig Clean Color Brush Markers to add the color right over the background coloring.   To finish I used Tim Holtz Distress Collage Medium MATTE  to add a few sequins from my stash.

I usually like to create a second card while I have out all the materials.  This is the second card that I made this session.


This one is square and uses the same stamp set.  To get the butterfly without the flower I just inked the butterfly and wiped any unwanted ink off before stamping.  No masking involved in the this card at all.   The embellishment is Pretty Pink Posh 6MM & 3MM CLEAR DROPLETS .

Thank you for dropping in to check out my blog.  Your comments, questions and suggestions are always welcome.


Thursday, April 26, 2018

Kind Heart

Today my Simon Says Stamp May Monthly Card Kit was in my mailbox.  I couldn't wait to make a card with the kit.  I am in love the color palette of the papers, stickers and inks in this kit.   The hummingbird image is so beautiful and  of course, teacup planters  will always appeal to my feminine side. 


I often use patterned paper as an inspiration for my color palette and the patterned paper from Pinkfresh Studio "Let Your Heart Decide" in this kit is so beautiful.  The one that I used for this card is just the kind that totally gets my creative juices flowing.  I will most likely be using it as inspiration for another card soon.
The stamping was done with VersaFine Onyx Black ink onto Canson Bristol XL paper.  For coloring I used watercolor markers from Tombow and a watercolor brush to closely match the colors present in the paper.   
Almost everything that I used to create this card can be found in the May Monthly  kit which is at this moment still available.  They do sell out quickly.   I did use the Die-namics MFT651 "Cross Stitch Oval" die (may no longer be available) for my focal panel and the "Stitched Banners" SSSD111584 from Simon for the sentiment.   The sequins are from my stash and I am not sure that they were need. 

Thank You for stopping by my blog.  Your comments, questions and suggestions are always welcome.

Challenges:  Simon Says Stamp Wednesday Challenge

Monday, April 23, 2018

Sparkle & Shine Birthday

The background for this card is something I created a bit ago but wasn't quite sure how to finish it.  The Wednesday Challenge with Simon Says Stamp this week is to add Sparkle and Shine.  I was inspired by that idea to add the finishing touches to make this card. 


The background stamp I used is Simon Says Stamp "Emma Background" SSS101692 .  It was stamped using VersaMark Ink and heat embossed with super fine white embossing powder.  Then I sponged with Distress Oxide Ink in "Worn Lipstick" and "Picked Raspberry".  The splatter is watered down Distress Oxides and a little white gouache'.

The sparkle comes from the Nuvo Glitter  Drops "Silver Moondust" and a dies from Memory Box "Elegant Scrollwork" cut from silver glitter cardstock .  
The sentiment is an older Hero Arts set Called "Birthday Sayings" which may no longer be available.  It is stamped on a "Stitched Banner" die from Simon Says Stamp. 

Thanks for stopping in to take a look at my card creations.  Your comments, questions or suggestions are always welcome. 

Tuesday, April 17, 2018

Birthday Fishes

I am always in need of more birthday cards for the fellows in my life.  So with that in mind, I created this one using stamps and dies from Tim Holtz.


This card is also going to be an entry in the Simon Says Stamp blog Wednesday Challenge . the challenge theme is "Add Texture" and the suggested product is Tim Holtz.   For the texture I did an embossed and inlay technique.  The die I used is actually on from Tim Holtz "Holiday Greens"  658759 thinlits .  
My background is Distress Oxides "Salty Ocean" and "Faded Jeans" applied with a water brush.  I also added a touch of texture by sponging thru a stencil
I used Archival Inks to stamp the images from Tim Holtz "Sea Life" CmS304 .  I inked the die cuts with the Colbalt Archival and heat embossed using Hero Arts "White Satin Pearl" powder.
As a final touch of texture I applied some drizzles of Collage Medium Matte and sprinkled on some vintage gold glitter from my stash.
Thanks for stopping by to check out my latest card.  Your comments, questions and suggestions are always most welcome.

Supplies:

Dies:         Holiday Greens"  6587 
Stencil:    Tim Holtz Layering Stencil DOT FADE THS006


Friday, January 13, 2017

Magic Slider Winter Birthday Card


One of the gifts I received  for Christmas  this year was the Magic Slider die from Simon Says Stamp.  I hadn't gotten an opportunity to use it yet.  I thought I would give it a try and make my first slider card.  Jennifer McGuire did a video before Christmas for the SSS Die-cember release.  Her youtube video features this die with an great explanation of it's use at the end of a product release post.  HERE  


This is what the my card looks like when you pull open the magic slider.   I used distress ink and a stamps from "Cute Snowflakes" set by Simon Says Stamp for the snowy background.  All the other stamps used are by Lawn Fawn.  

Thank you for dropping by to check out my first Magic Slider card.  It was fun to make.  Your comments, questions and suggestions are always welcome.

Challenges:


 Supplies:


Tuesday, January 10, 2017

Wishing All A Happy, Healthy & Prosperous New Year!


I am looking forward to the New Year and hoping that recent health issues for my husband and myself are left behind in 2016.  December was a hectic month for me, not only was there all the usual holiday excitement, but I was recovering from knee replacement surgery.    My surgery went very well and I am back to my blog with a clean slate for the 2017.  

Today I am sharing a couple of my latest cards to celebrate the New Year.   I used the Hero Arts Monthly December  Kit for both.  Love the dimensional burst die that is included in the kit. The kit also includes some wonderful papers and a very glittery gold embossing powder. Perfect for cards with a lot of pizzazz.  

For the top card:

  • Cut the blue glimmer paper to 4" X 5 1/4" and the gold foil paper to 4 1/4 X 5 1/2.
  • Diecut the burst from the glimmer blue paper and draw a line on each beam with the gold pen from the kit.
  • I cut the sentiment apart, stamped the New Year portion from Hero Arts " Greetings for the Holidays" CL619 with VersaMark and heat embossed with the gold glitter powder.
  • Diecut several of the star bursts and Happy " Merry and Bright" Ellen Hutson EEDIEJ-006-14 from the gold fold paper and glue with dot of Multi Medium to the tips of the beams.  I added a bit of multi medium under each beam and let it dry to help maintain the dimension in the burst.
  • Adhere the blue to the gold layer and then both to a A-6 white card base.


For my second card: 

  • Used Allery Elle "Wonky Stitch Die" D-04-11 to cut the blue panel and a white card stock panel.  I also used a smaller rectangle die from "Lil' Inker Designs " stitched rectangles for stamping the champagne bubbles.
  • Stamp and die cut the bottle from a scrap of green glimmer paper (in my stash) and again on a scrap of white CS for the label.  I used the small circle from a die cut tag to add for the gold label.  Color added with Antique Linen Distress Marker.
  • Die cut the "Cheers" from both the gold foil and the blue glimmer papers.
  • After cutting the burst from the gold foil, I cut away the excess paper to reveal the beams of the burst.
  • My stars are from my stash and created with the Simon Says Stamp "Stacked Stars" Die  SSD111599.
  • The "2017" was created using my Silhouette.
  • The card base is A-6.  4 1/2" x 6". 
I am adding this card to the current challenge with the A Blog Named Hero because the kit is new to me.  The Wonky Dies were also a Christmas gift and therefore new to me so  I am entering the Wednesday Challenge at SSS.
Thanks for dropping by my blog.  Your comments, questions or suggestions are always very welcome.


Supplies:


Monday, October 10, 2016

Autumn Greetings

Today I am sharing 3 cards that I made using the October Monthly Card Kit from Simon Says Stamp.   I am sure this kit is already sold out because they are so popular and this one with the beautiful fall colors probably went faster than most.  So this is for those of you who need inspiration for the kit or just need an idea for a autumn card.

This first one is quite simple using a the Paper Smooches Stitched Dies  for some fun details.
Everything else for this one was included with the kit.  The only exception being the brown ink I used for the sentiment, the squirrel and the acorn.


The second of my three cards was inspired by the layout for a Christmas card I did last year.
I simply replaced the holly and Christmas print with the squirrel and the this pretty fall plaid.  The two colorful inks I used for the corner are both in the kit.  The brown ink is one that I already owned.

My third card uses the remains of the sheet of fall plaid that I used on the card above.  I often try to use a small remnant like this right away so that it doesn't get overlooked.  The banners are cut using a die from SSS "Bundle of Stitched Shapes" that I go to often.


I plan to enter at least one of these cards in the Wednesday challenge on the Simon Says Stamp Blog.
Thank you for stopping by my blog.  Your comments, question and suggestions are always most welcome.

Supplies:


Thursday, August 18, 2016

Butterfly Border Birthday


I made this card for the current Wednesday Challenge on the Simon Says Stamp blog,  Make for the Border.    As the name implies the challenge is to make a card with a border.  The showcase company this week is Memory Box.   I decided to create my cutout border using one of my favorite Memory Box dies, "Vivienne Butterfly".  The border edge is a partial die cut technique.  There is a wonderful youtube video by Jennifer McGuire that gives instruction for this method.  Here
For my background I used Distress Crayons that I first scribbled on then misted and smudged.  To add a finishing touch I put some matching Distress Ink on my craft sheet. Then I added water to make a liquid that could be splatter with a brush.
My sentiment is much easier that it might seem.  I printed it with my ink jet printer onto vellum. While the ink is still wet I add clear embossing powder and heat emboss.  Looks great and it is so easy.  I can create a whole page at a time.

Thanks for dropping in to view my blog.  I always welcome comments, questions or suggestions.


Supplies: