Showing posts with label Hero Arts Monthly Kits. Show all posts

Wednesday, August 5, 2020

Hero Arts MMK July Underwater Slimline Card

This is a fun slimline card that I created using the Hero Arts My Monthly Hero Kit for July and the add-on set called "Deeply in Love".

The underwater scene at the bottom of the card was done using a stencil that I cut from the die included in the kit.  If you are interested in the details I made a YouTube tutorial with all the details.

Supplies:


Stamps:   Hero Arts            My Monthly Hero Kit July 2020 & "Deeply in Love" with Dies
                     Lawn Fawn         "Wavy Saying" coordinating dies "Fancy Wavy Sayings"
Dies:          Lawn Fawn          "Large Slimline with Sliders"
Inks:          Distress Oxide    "Salty Ocean" & "Chipped Sapphire"
                     Hero Arts             "Splash" & "Blue Hawaii" from the kit
                                                     Also "Intense Black"
Misc:         Ranger                   Glossy Accents

Thank You for dropping by!  Your comments, questions and suggestions are always most welcome here.

Saturday, August 18, 2018

Hero Arts Coffee Lovers Tunnel Card

The Hero Arts My Monthly Kit for August arrived and I was anxious to have some fun with it.   The fancy frame die included this month kit was an immediate favorite.   This die alone makes the price a bargain in my mind.  When I saw this Youtube video from Jennifer McGuire, I was inspired and ready to challenge myself to make an inside tunnel card. 


From the outside the card is sorta fun.  I used a border die from Simon Says Stamp, the DOT SCALLOP BORDER Wafer Die, to make my scalloped background layer.   All of the stamps I used here are included in this month's kit.  I colored the cups with my copic markers and die cut them using the coordinating dies in the kit.  Then, I  coated them with VersaMark embossing ink and used a clear embossing powder to give them a glossy finish.


The MAGIC happens when you open the card to the inside tunnel.   I followed the tutorial from Jennifer but made my card but made a few modifications to create this version.    I typically make my cards A6 size.  This size uses a base of 6"X 9" as opposed to your the commonly used A2 size base of 5 1/2" x 8 1/2".   You will still cut two base cards and cut off  1/2" from the edge of one of  the 6"X 9" base cards and the score line will be at 4 1/2".  The second base card will be scored at 1/2", 4 1/2",and 5".  The inside tunnel panel is cut to 4 1/2" by 6",  you will need to cut a sliver off the 4 1/2" edge. then score it at 1/4" on both sides.   I used the fancy frame die to cut the first layer of my tunnel.  I cut the frame die a second time from a piece to scrap so that I could use just the table and chairs parts for my cafe scene.   To make an opening for the inside tunnel layer, I used a Die-namics Inside & Out Stitched Rounded Rectangle  an lined it up like a window to my cafe.
I added just a touch of coloring to the inside of the tunnel using Distress Oxide Inks, TUMBLED GLASS and ICED SPRUCE.   I added the extra tables to the back side of my inner layer and stamped the sentiment from the kit using the Iced Spruce Distress Oxide ink.
Sounds complicated but it was such fun and worth the effort.  I know this because I am ready to do it again soon.

Thank you for dropping by my blog.   Your comments, questions and suggestions are always very welcome.

Tuesday, July 17, 2018

Summer Memories

The the latest My Monthly Hero Kit brings me back to my childhood.  I grew up in a very rural area in central Missouri, over a 100 miles from either Kansas City or St. Louis.  The traveling fairs that would set up in our small town for a few days were a huge event that we looked forward to each summer.  They meant carnival rides, cotton candy, games and usually fireworks for the 4th of July.  
This one uses the stamps from the kit and a red, white and blue theme.   I put the image on a tag die from Tim Holtz Framelits Tag Collection 658784 that I shorten by about an inch.  I used the inks from the kit and added only a few touches of red and yellow coloring with ZIG Markers.  
 My second card is shaker card that I made using an add on set from the Hero Arts July release, "Ornate Carousel"  Cm296.    The frame is from a die that I purchased a while back from Amazon and it looks like it is no longer available.  Any square die set could work.   The coloring of the carousel horses was done with the Zig Markers, but I used some Copic markers in the greys and blue to add the floor and sky.


For the third card I used inside cut from the frame die to make my border piece.  The die that I used to cut my image panel from Bristol Paper is from Gina K Designs, Rectangle SM Set Double Stitch .  The coloring for this one done using watercolors.

I added embellishments to the first card with Tonic SILVER MOONDUST Nuvo Glitter Drops and to the third care with Studio Katia CUPID'S KISS Crystals.  
I will be entering my cards in the current challenge with A Blog Named Hero.  The challenge this month is Birthday Cards.

Thank you for dropping into my blog.  Your comments, questions and suggestions are always welcome.


Saturday, June 23, 2018

Beach Time!

The card I am sharing today was made using the June My Monthly Hero Kit and an add on set to create a fun beach scene.  I think this is a perfect card to celebrate the first day of summer and to enter in the current challenge titled "Summertime Fun" over at A Blog Named Hero.  I am also adding this one the Simon Says Stamp Wednesday Challenge.  The theme is "Bright and Cheerful" and the highlighted product line this week happens to be Hero Arts.

Sadly, the June My Monthly Hero Kit is sold out but the add-on set "Beach Please Stamp and Cut DC238 that I used for this card is still available.  As you might see I had a lot of fun creating this summer fun card.  The beach embossing powder that was part of the monthly kit was perfect for creating the sandy beach scene.   Everything here was from Hero Arts with the exception of the "Stitched Banner" die from SSS and my copic markers used for coloring the image.                                                                                                                                                                                                                                                                                                                                                                                                                                 
Our dog Rory's favorite thing in the world is a trip to "the sandy place".  That for us is a beach on the shore of Lake Michigan.  We don't dare say the word "beach" in his hearing because he knows what the word means and just get super excited.

Here is a picture taken with him wearing his "Doggles" making the trip down to the Dog Beach in Chicago where he will swim and fetch until he has exhausted himself.


Hope you all enjoy your summer as much as Rory.  
Thank you for visiting my blog.  Your comments are always very welcome.

Thursday, May 3, 2018

Put A Flower On It

 This is a card that I created for the new challenge over at A Blog Named Hero.  The challenge is to "Put A Flower On It" so I went through my Hero Arts floral stamps and pulled out this pretty rose stamp and the coordinating dies from an older Hero Arts My Monthly Hero Kit.  This one is from April of 2016 and I still love it.


First I used my stitched rectangle die and a Tim Holtz Sizzix MIXED MEDIA Thinlits Die 660220  to make a panel from Canson Bristol XL paper.  I stamped the flower image in the lower left hand side of the panel using Hero Arts "Soft Granite" Ink.   I also stamped the flower and the bud two more times on a another piece of the paper so that it could used to make the 3D layers.   For the coloring I used  Zig CLEAN COLOR Markers and a waterbrush .   Most of the coloring  was done by  putting the color on my craft sheet and picking it up with the waterbrush to get more of a wash effect.   I used the dies to layer the flower pieces and popped them up with foam squares for extra dimension.    I added a sentiment from SSS MESSAGES FOR EVERYDAY sss101831 .  The banner die I used is from Simon Says Stamp, STITCHED BANNERS Wafer Dies SSSD111584.  To embellish  I used my collage medium to adhere a few of the Lucy's Cards CLEAR IRIDESCENT Jewels LBJ02 .


I decided to submit this card to the challenge but it was the second card of two cards that I created for the challenge. The first one I did is this one. It is very similar but uses a different floral, coloring and no 3D treatment. This stamp is Hero Arts K6136 Antique Rose Stem.

Thank you for stopping by to check out my work. Your comments, questions and suggestions are always welcome.


Tuesday, April 24, 2018

Fiesta Time !

I finally am getting some time to post my latest card creations using the My Monthly Hero April kit.  This kit is still available the last time I checked.  As you can see I am have fun playing with it.  These are five of the cards I have done with it so far.


Card # 1
The background on this 1st card was created by masking off a circle then using the inks in the kit to sponge in and blend the colors. The die also included in this kit was cut from black cardstock.  I also cut a small rectangle from the black cardstock to make a little stage for the trumpeter.  All the images for the five cards were stamped using Memento Tuxedo Black Ink and colored with Copic Markers


Card #2


For this second card put my little bird birthday scene on a tag cut from Kraft cardstock using a die from Lil Inker "Anytime Tags".    The ribbon was included in the kit. I stamped both of the sentiments onto white cardstock and highlighted both with some of the same colors of Copic markers that were used in the coloring. The sentiment strips were using a very inexpensive set of dies that I order on the Amazon site.   They don't appear to be available any longer.
Card #3

Cards #3 and #4 both use the same Lil Inker tag die.  The backgrounds were created using a Stencil Brush  and the ink from the kit to apply very light coloring.
For both of these cards I used the Unryu Paper in this month's kit.  
Card #4


For card #3, I put the Unryu paper in my paper trimmer but instead cutting it I ran a bead of water on the cutting line and gently tore the paper along the water lines.  I love the natural looking edge you get with this method.  I also used an edge die from Die-Namics "Homespun Stitch Lines" for a finishing touch to the edge.   For Card #4, I used the Unryu paper to create a fringe embellishment for the bottom edge of the tag. I have also known this type of paper to be called "Mulberry" paper.


The fifth card is probably my favorite because it is a shaker card.  I used a die from Poppy Stamps " Madison Window " to create a shaker window for the musical mouse to perform from.  The "Wonky Stitches" die from Avery Elle was used for the panel.

Thank You, for dropping by to check out my blog.   Your comments, questions and suggestions are always very welcome. 

Wednesday, November 15, 2017

Hero Arts Christmas Shaker

When I got the Hero Arts My Monthly Kit for October my first idea was a snow globe and of course it would need to be a shaker too.  The October kit is sold out but I thought I would share my card for those of you who have the kit and might find some inspiration in my card idea.

I created the snow globe using a stamp and die set from Lawn Fawn "Ready Set Snow" LF 973 and LF 975.  My card is a square card measuring 5 1/2" X 5 1/2" overall.   My north pole scene was stamped then colored using Prismacolor pencils onto a panel of white card stock measuring 5" X 5".  My shaker panel is  created by cutting the snow globe from fun foam and the patterned paper taking care to line up all the openings above the image.   To assemble the shaker, I glued the foam in place with multi media matte , added the sequin mixture then a piece of acetate and the pre-stamped patterned paper.   The snow globe base was stamped onto a scrap of the red card base and cut out with the coordinating die set.  To finish it off I added the cute Eskimo dog sled, a bow from a bit of waxed cording and couple of glittery brads from my stash to embellish the sentiment.  

This is a second card that I made using the October Kit.   I used a oval die to cut out my focal area from white card stock that I then embossed using a folder from Cuttlebug "Ben Day Dots"  The little scene was created using post it notes as masks, stamping an coloring with copic markers.  In the end I also drew in a little building with a micron marker behind the train because the stamp lines were hitting in the wrong spot on the little train.  It worked and I think it looks better after that little correction of my mistake.

Thanks so much for dropping by my blog.  I hope you found something to inspire you to create something fun.  Your comments, questions and suggestions are always welcome.

Friday, August 18, 2017

Stardust on My Craft Table

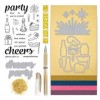
Hello everyone!  I have not done a recent post lately but couldn't resist sharing my latest creations using the August My Monthly Hero Kit.  When I pulled this kit out of the box, I knew that I was going to have fun making some night galaxy skies.  For a girl who likes her sparkle this one is perfect.


To get the shine started for this card, I pulled out my frequently overlooked Minc machine.   I die cut the silhouette from a both heavy white card stock and a new to me product iCraft Deco Foil "PeelnStick Toner Sheets.  I peeled off the backing and adhered the toner to the die and ran it thru my Minc. with therm-o-web "Antique Pearl" transfer foil.  Magic... beautifully foiled and perfect.
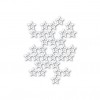
For the background, I first stamped the galaxy star images using VersaMark ink and heat embossed with white detail embossing powder.  I then placed the panel in a cardboard box and lightly sprayed the piece with the dark blue shimmer spray from the kit.  While still wet I sponged off some of the color that landed on top of my embossed images.  The sentiment was heat embossed after my panel was totally dry.  To bring back some of the detail I used my Uni-ball Signa white pen to highlight a few of the stars and the fishing line.  Then to add even more glittery fun, I backed my panel with silver glitter paper from DCWV and added a few touches of glitter adhered with Multi Media Matte.


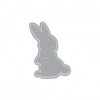
My second card was very simple.  This beautiful specialty paper was included in the kit and it makes a wonderful backdrop for a simple silhouette like that of the floating girl.  She was heat embossed using black detail powder.  The sentiment is also heat embossed using a silver detail embossing powder.  These stars were created at the same time as the dies from the card above using my Minc. machine.  If you don't own this machine, I think that you could get a pretty result by simply embossing the star dies with a silver embossing powder.  I backed the white panel with a piece of the glitter card stock that was a left over from my first card.  After assembling my panel,  I adhered it to a  5.5" X 5.5" card made from a black shimmer card stock.

It was my pleasure to share my cards and hopefully inspire you.  Thank you, for dropping by to see them.  I am always happy to receive your comments, questions or suggestions.

Thursday, July 20, 2017

Summer Floral Notecards

The cards I am sharing today are a gift set that I made for a friend using the July My Monthly Hero kit.  The note cards are all 4 bar sided using the same stamps for the image and each opens to a blank sheet of paper cut to size for the inside.

The bucket was stamped with Black Archival Ink.  I used a small piece of micro pore tape to mask off a the back edge of the bucket.  Using water based markers I applied the ink directly to the stamp.  The colors I used here are from an very inexpensive set of markers that I purchased at Costco a few years back but, I could have used Tombow, Zig or even Distress Markers to get a similar end result.   I applied the markers to different sections of the stamp to color the image and repeated,  each time adding more color using my Misti.  First using the darker purple, adding the green where I thought there would be stems and then going back with two lighter shades of purple pink.  When I was happy with the colors, I went over some of the flowers using a the brush just water to do a little blending of the colors.
For the pail,  I scribbled a grey marker onto my craft mat and using a wet brush applied the color with just a touch of the green color from my leaves.   The shadow at the bottom was done the same way. 

I used the single floral spray from the kit and the bow to add an embellishment to the envelopes in my set. There are 6 note cards in the set which I packaged in a clear box tied with a bit of purple ribbon.

Thanks for dropping by my blogspot.  Your comments, questions and suggestions are always very welcome.

Supplies:


Monday, March 20, 2017

Hero Arts Spring Cards

The cards I am sharing today were created with some special recipients in mind.  These are among a group of cards that I plan to donate to "Cards For Hospitalized Kids Charity".  Their mission is to send cards to hospitals all over the US to help brighten the days of seriously ill children who often feel scared and lonely.

Here's their website if you would like more information:
www.cardsforhospitalizedkids.com/


All four of my cards use a predominance of Hero Arts products.  This first one uses the monthly kit from March and one of the add on sets from February called " Fun In the Rain" CM152.  For the watery background I used a wash of watercolor and then added the pooling and splashes with stamps from the set and Distress Tumbled Glass Ink.  The duck and ducklings are colored using Copic Markers.

This second card is created using the " Paper Layering Rabbbit"  DI371 and elements from the Hero Arts March Kit of the Month.   The fence, Easter basket with eggs and the burlap are all from the March Kit.  I used Copics to color the basket and eggs and added just a touch of color the bunny with colored pencils.


This one is probably my favorite of the four.  I just love the way the vegetables from the set can be tucked into the garden soil created using the die from the March set.  There is also a sentiment that says "how does your garden grow" which would be perfect for a gardening friend.  I chose this one because it is meant to cheer a sick child.  All the coloring is Copic except the cloudy sky which I created by sponging Distress Ink over the clouds included in the February Hero Arts monthly kit.

This is the closed view of my box card

The last card is a box card.  When I get a new stamp set I often stamp all of the images on a heavy cardstock and color them without and idea as to where I will use them.  I like doing this because it allows me to make little scenes for my cards.  This card is one that I created using the colored images that I had left over from the cards above.
The box card base is from a die by Lawn Fawn.
This is the opened box card
I think that box cards are a lot of fun for children and hope this one will bring a smile this Easter.
The umbrella and rainbow are from the February monthly kit and the rest are from the March kit.

Thank you for dropping by my blog.  Your comments, questions and suggestions are always most welcome.


Supplies:


<

Tuesday, January 10, 2017

Wishing All A Happy, Healthy & Prosperous New Year!


I am looking forward to the New Year and hoping that recent health issues for my husband and myself are left behind in 2016.  December was a hectic month for me, not only was there all the usual holiday excitement, but I was recovering from knee replacement surgery.    My surgery went very well and I am back to my blog with a clean slate for the 2017.  

Today I am sharing a couple of my latest cards to celebrate the New Year.   I used the Hero Arts Monthly December  Kit for both.  Love the dimensional burst die that is included in the kit. The kit also includes some wonderful papers and a very glittery gold embossing powder. Perfect for cards with a lot of pizzazz.  

For the top card:

  • Cut the blue glimmer paper to 4" X 5 1/4" and the gold foil paper to 4 1/4 X 5 1/2.
  • Diecut the burst from the glimmer blue paper and draw a line on each beam with the gold pen from the kit.
  • I cut the sentiment apart, stamped the New Year portion from Hero Arts " Greetings for the Holidays" CL619 with VersaMark and heat embossed with the gold glitter powder.
  • Diecut several of the star bursts and Happy " Merry and Bright" Ellen Hutson EEDIEJ-006-14 from the gold fold paper and glue with dot of Multi Medium to the tips of the beams.  I added a bit of multi medium under each beam and let it dry to help maintain the dimension in the burst.
  • Adhere the blue to the gold layer and then both to a A-6 white card base.


For my second card: 

  • Used Allery Elle "Wonky Stitch Die" D-04-11 to cut the blue panel and a white card stock panel.  I also used a smaller rectangle die from "Lil' Inker Designs " stitched rectangles for stamping the champagne bubbles.
  • Stamp and die cut the bottle from a scrap of green glimmer paper (in my stash) and again on a scrap of white CS for the label.  I used the small circle from a die cut tag to add for the gold label.  Color added with Antique Linen Distress Marker.
  • Die cut the "Cheers" from both the gold foil and the blue glimmer papers.
  • After cutting the burst from the gold foil, I cut away the excess paper to reveal the beams of the burst.
  • My stars are from my stash and created with the Simon Says Stamp "Stacked Stars" Die  SSD111599.
  • The "2017" was created using my Silhouette.
  • The card base is A-6.  4 1/2" x 6". 
I am adding this card to the current challenge with the A Blog Named Hero because the kit is new to me.  The Wonky Dies were also a Christmas gift and therefore new to me so  I am entering the Wednesday Challenge at SSS.
Thanks for dropping by my blog.  Your comments, questions or suggestions are always very welcome.


Supplies: