Sunday, December 10, 2017

A Wish For Peace

This card is going to be my entry in the Penny Black Saturday Challenge for the month of December, the theme is "Winter or Christmas".  I thought I would use my new Penny Black set, "Peaceful Winter" 30-450 with an older set "Christmas Harmony" 30-194 for the sentiment.


To begin I used post its to mask off the hillside and a moon shape. Then I used  Distress Inks to sponge in a sky.  After I was happy with the sky, I added in the trees using my Misti tool and Distress Inks which I layered using with repeat stamping different colors of the Distress.   I used a waterbrush to work the colors in the scene, diluting in some areas and blending it into the scene.


Thank You for dropping in to my blog.  Your comments, suggestions and questions are always very welcome.

Sunday, December 3, 2017

Peace on Earth

I always find that Christmas cards using these peaceful blue tones are among my favorites to create.  For these two cards I used stamps from a Limited Edition Tim Holtz set that was part of the Simon Says Stamp Stamptember event.  Sadly they are no longer available.  I hope that some of you who got these stamps may find some inspiration in my cards.
Both of these cards were easy to create and I loved the result.  I started by using Distress Oxide Inks to make a blended background and activated the ink with some water splatters.  Once dryed and treated with my anti static pillow, I heat embossed the images with super fine detail white embossing powder.  My favorite is from Hot Off The Press Inc.  


For the snowflakes and to back my panels I used some glitter paper from DCWV .  These snowflakes are from a Simon Says Stamp Die, "Stitched Snowflakes" Style S329. The Peace On Earth sentiment used on the top card is a Tim Holtz "Holiday Words" thinlet die.  The stitched rectangle die is one that use so much and it is the one from Lil Inkers Inc.
I am adding these two cards to the Simon Says Stamp Wednesday Challenge.

Thanks for dropping by my blog.  Your comments, questions and suggestions are always welcome.

Wednesday, November 15, 2017

Hero Arts Christmas Shaker

When I got the Hero Arts My Monthly Kit for October my first idea was a snow globe and of course it would need to be a shaker too.  The October kit is sold out but I thought I would share my card for those of you who have the kit and might find some inspiration in my card idea.

I created the snow globe using a stamp and die set from Lawn Fawn "Ready Set Snow" LF 973 and LF 975.  My card is a square card measuring 5 1/2" X 5 1/2" overall.   My north pole scene was stamped then colored using Prismacolor pencils onto a panel of white card stock measuring 5" X 5".  My shaker panel is  created by cutting the snow globe from fun foam and the patterned paper taking care to line up all the openings above the image.   To assemble the shaker, I glued the foam in place with multi media matte , added the sequin mixture then a piece of acetate and the pre-stamped patterned paper.   The snow globe base was stamped onto a scrap of the red card base and cut out with the coordinating die set.  To finish it off I added the cute Eskimo dog sled, a bow from a bit of waxed cording and couple of glittery brads from my stash to embellish the sentiment.  

This is a second card that I made using the October Kit.   I used a oval die to cut out my focal area from white card stock that I then embossed using a folder from Cuttlebug "Ben Day Dots"  The little scene was created using post it notes as masks, stamping an coloring with copic markers.  In the end I also drew in a little building with a micron marker behind the train because the stamp lines were hitting in the wrong spot on the little train.  It worked and I think it looks better after that little correction of my mistake.

Thanks so much for dropping by my blog.  I hope you found something to inspire you to create something fun.  Your comments, questions and suggestions are always welcome.

Sunday, November 5, 2017

Christmas Thank You with Penny Black

Yay! .... I just discovered a new challenge and the best thing about it is that it features stamps from my favorite company Penny Black.  Thanks to my fellow card making friend, Greta for giving me the information.  Today's card is for the Penny Black Saturday Challenge.  The challenge of the group this month is to create a thank you card using a Penny Black product as the main focus.

For my trees I pulled out an oldie that is still available "Robin's Kingdom" 30-056.  The trees were embossed with white embossing powder.  I used Distress Inks in "Tumbled Glass" and "Stormy Sky" to sponge in a sky over a masked hillside that I created using post it notes. I didn't bother with masking the trees before adding the sky.  It was easy to just add the color over the top of the blue, which I did with a waterbrush and distress ink used as watercolor. My little Penny Black skating mouse is from the "Jolly Critters" 30-264 set and colored with Prismacolor pencils. To give the illusion of ice or snow I again used the distress ink with my waterbrush to add some lines and a touch of color.  The sentiment is also a die from Penny Black "Wishes" 51-036.  For a bit of sparkle I added some glossy accents and applied a some crystal glitter to it while it was still wet. 
I know that I always need thank you cards around the holidays.  This one may be going to my mail carrier.  Hope you find the card inspiring and that you may also check out the lovely challenge with the Penny Black Saturday Challenge group.
Thanks for dropping by my blog.  Your comments, questions and suggestions are always most welcome.

Friday, November 3, 2017

Penny Black Christmas / Colored Pencils

The fall has been so busy that my poor blog has been really neglected.   Even though I have been doing loads of creative things finding the time to add a few to my blog has been an afterthought.
Today I am sharing some cards that I created using my Prismacolor Pencils.  The coloring was a perfect thing for me to work on while we were having some remodeling done.  I pre-stamped the images so that I could simply color away while things were in a state of confusion all around me. 


The stamps are all Penny Black, 30-386 "Wintertime Cheer" , 30-040 "The Wonder" , 30-439 "Gather Around".   I created a background by drawing lines for the flooring and wall which I lighted shaded around my images.

Thanks for dropping by to check out my blog.  Your comments, questions and suggestions are always very welcome.

Wednesday, August 23, 2017

Celebrate the Wonder

Today I have another Christmas card because I couldn't just stop with one of the new Penny Black stamps for Christmas 2017.   When this "Hedgy Joy" 30-447 stamp arrived I knew it was going to be a favorite.
 
I also pulled out a couple of my favorite older releases from my Penny Black collection to create the background for the hedgy.  The trees and star are from "Robin's Kingdom" 30-056 and the sentiment is from "The Wonder" 30-040
The hedgy is colored using Copic Markers.  The masking I did for my background used a combination of full adhesive Post-It notes and Pebeo drawing gum.  There was a very slight bleeding of the red copic marker with the drawing gum so if I were doing it again I would use the Post-It on the hedgy or color him in after the background. The snowy effect was created by splattering the sky with drawing gum, letting it completely dry and sponging over the splatters with Distress Inks.  The drawing gum works beautifully with Distress as a resist that you simply remove with your finger or an eraser to reveal the snowy sky.    I added some fine glitter to the star and the snowy hill for a finishing touch.

Thanks for dropping by my blog.  Making cards is my greatest joy second only to sharing them with others who might get inspiration for their own creations.  Your comments, questions or suggestions are always very welcome.

Monday, August 21, 2017

Christmas Cards In August?

Yes, I know it is August but my card making friends will totally understand why my thoughts are turning to the Christmas season.  The Penny Black release for the 2017 season is available and I couldn't wait to get started on this years cards.

These two cards are my first made with my new Penny Black 40-574 "Adornments" cling stamp.  I used Hero Arts pigment inks cubes applied directly to the stamp and my Misti to ink the ornaments.  You could use masks to help with the inking, but I just applied the ink to directly to the stamp and wiped off any ink in areas that I didn't want with a baby wipe.  The beauty of the Misti is the ability to add layers of color to an image.  To add back the color for the ornament hooks I used a Micron Pen to draw over the detail.  After I was happy with the inking, I stamped over the image one last time wit Versa Mark ink and heat embossed with a clear embossing powder.  The background is created by taping off an edge with Micro Pore tape and sponging in Distress Oxide inks in "Iced Spruce" and "Antique Linen".


I made a second card on watercolor paper.  The ornaments are colored using the same method as my first card but for this one I painted in a watercolor background.  After it was totally dry I added some glittery snow to the card using my Simon Says Stamp SSST121324 "Falling Snow" stencil and Faber Castell "Glass Bead Glitter Gel".

Thanks for dropping by to check out my cards.  I hope you found my technique inspiring and gives you an idea of how I worked with this stamp.  I always welcome any comments, questions and suggestions you may have.

Friday, August 18, 2017

Stardust on My Craft Table

Hello everyone!  I have not done a recent post lately but couldn't resist sharing my latest creations using the August My Monthly Hero Kit.  When I pulled this kit out of the box, I knew that I was going to have fun making some night galaxy skies.  For a girl who likes her sparkle this one is perfect.


To get the shine started for this card, I pulled out my frequently overlooked Minc machine.   I die cut the silhouette from a both heavy white card stock and a new to me product iCraft Deco Foil "PeelnStick Toner Sheets.  I peeled off the backing and adhered the toner to the die and ran it thru my Minc. with therm-o-web "Antique Pearl" transfer foil.  Magic... beautifully foiled and perfect.
For the background, I first stamped the galaxy star images using VersaMark ink and heat embossed with white detail embossing powder.  I then placed the panel in a cardboard box and lightly sprayed the piece with the dark blue shimmer spray from the kit.  While still wet I sponged off some of the color that landed on top of my embossed images.  The sentiment was heat embossed after my panel was totally dry.  To bring back some of the detail I used my Uni-ball Signa white pen to highlight a few of the stars and the fishing line.  Then to add even more glittery fun, I backed my panel with silver glitter paper from DCWV and added a few touches of glitter adhered with Multi Media Matte.


My second card was very simple.  This beautiful specialty paper was included in the kit and it makes a wonderful backdrop for a simple silhouette like that of the floating girl.  She was heat embossed using black detail powder.  The sentiment is also heat embossed using a silver detail embossing powder.  These stars were created at the same time as the dies from the card above using my Minc. machine.  If you don't own this machine, I think that you could get a pretty result by simply embossing the star dies with a silver embossing powder.  I backed the white panel with a piece of the glitter card stock that was a left over from my first card.  After assembling my panel,  I adhered it to a  5.5" X 5.5" card made from a black shimmer card stock.

It was my pleasure to share my cards and hopefully inspire you.  Thank you, for dropping by to see them.  I am always happy to receive your comments, questions or suggestions.

Thursday, July 20, 2017

Summer Floral Notecards

The cards I am sharing today are a gift set that I made for a friend using the July My Monthly Hero kit.  The note cards are all 4 bar sided using the same stamps for the image and each opens to a blank sheet of paper cut to size for the inside.

The bucket was stamped with Black Archival Ink.  I used a small piece of micro pore tape to mask off a the back edge of the bucket.  Using water based markers I applied the ink directly to the stamp.  The colors I used here are from an very inexpensive set of markers that I purchased at Costco a few years back but, I could have used Tombow, Zig or even Distress Markers to get a similar end result.   I applied the markers to different sections of the stamp to color the image and repeated,  each time adding more color using my Misti.  First using the darker purple, adding the green where I thought there would be stems and then going back with two lighter shades of purple pink.  When I was happy with the colors, I went over some of the flowers using a the brush just water to do a little blending of the colors.
For the pail,  I scribbled a grey marker onto my craft mat and using a wet brush applied the color with just a touch of the green color from my leaves.   The shadow at the bottom was done the same way. 

I used the single floral spray from the kit and the bow to add an embellishment to the envelopes in my set. There are 6 note cards in the set which I packaged in a clear box tied with a bit of purple ribbon.

Thanks for dropping by my blogspot.  Your comments, questions and suggestions are always very welcome.

Supplies:


Wednesday, July 12, 2017

A Venti Cup a Day Keeps the Doctor Away???

They say it is actually good for me.  Finally, something that I enjoy is reportedly not bad but good for me.  Did you see THIS.  I have begun working on an ART Journal and this is the second page.
The subject of my page is coffee and my love of it.   The Art Journal that I have chosen to work with is one that I purchased at Michaels.  The pages are chipboard with a ring binder.
This is my first attempt at a Journal and I wanted something that I could add dimension too.

I began this page by painting on two layers of Gesso to prepare the surface and block out the color of the chipboard.  The Gesso makes it a bit more challenging to work with water reactive inks as the surface is more water resistant.  I found that if I didn't dry the layers thoroughly it could be easily rubbed off.  I used a combination of Distress Oxides and regular Distress Inks in the background.  The three coffees were stamped onto watercolor paper, colored with watercolors, fussy cut and then adhered with Multi Media Matte.  The burlap, lettering and arrow were all attached with the Multi Media Matte.

Thanks for visiting my blog.   Your comments, suggestions and questions are always welcome.

Supplies:


Tuesday, June 27, 2017

Floral Bliss & Lace Birthday Cards

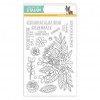
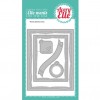
My cards today were created as an entry in the Simon Says Stamp Flickr group challenge. You can find details and rules for the challenge HERE.  The challenge is to use a stencil in your creation.  I just got the beautiful Circular Lace by Simon Says Stamp which I thought would be fun to use in the challenge.

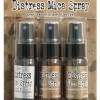
The idea for the background was a combination of a my original idea and a happy accident along the way.   I used a spray glimmer mist that has been in my stash for a long time from Tattered Angels to mist over the stencil.  This background was actually a piece of paper that I placed behind the panel that I was going to use for my card.  When I picked up my original panel I saw the impression that was left behind and liked it more.  It gave me the idea for this angled background.   .   
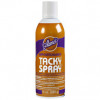
I have recently seen card makers adding a spray of adhesive to the back of the stencil to hold it in place.   I have to admit that I wasn't so sure about this... but thought I would give it a try.  It worked like a charm.  The next time I need to hold a stencil in place I will definitely do it again.  The only caution I would advise is to use the spray in a well ventilated area.
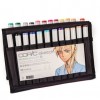
For the floral spray I stamped the flowers onto vellum using VersaMark and heat embossed with white embossing powder.  I turned the vellum over and used my copics to add some color to the backsides,  you don't even have to stay in the lines.  I then fussy cut out each of the flowers and leaves.  They are adhered in place using Scor Tape, the coloring keeps it from showing on the front side.   

This card is more of where I was headed with my original idea.  Used the same materials here with a different color scheme.  The small daisy flower is stamped and heat embossed onto a yellow card stock.  

I added some Liquid Pearl drops to the top card and white Nuvo drops to the second card.  In the end I have two cards that are created with the same idea in mind and two different looks.

Thanks for dropping by.   Your comments, questions and recommendations are always very welcome.
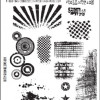
Supplies: